

You can clean your AC evaporator coils inside your house without removing the unit. Shut off power at the breaker, open the air handler access panel, vacuum loose debris off the fin surface, spray no-rinse foaming coil cleaner from bottom to top, let the foam sit for 15 to 20 minutes, and let it drain into the condensate pan on its own. Total tool and supply cost: under $30. Do this once a year before cooling season, twice a year if you have pets or run cheap fiberglass filters.
What Are AC Evaporator Coils and Where Are They Located?
The evaporator coil is the part of your air conditioner that actually cools your home's air. It lives inside your air handler unit, which is typically installed in a closet, attic, utility room, or mechanical space. Refrigerant runs through the coil at a very low temperature. As warm air from your living space blows across it, the coil absorbs the heat and the air coming out the other side is cool and dehumidified.
Over time, dust, pet dander, mold spores, and airborne particles accumulate on the coil fins. That layer of buildup acts like insulation. It blocks the heat transfer your AC depends on to function efficiently. A dirty evaporator coil forces the system to work longer and harder, drives up your electricity bill, and can eventually cause the coil to freeze over completely.
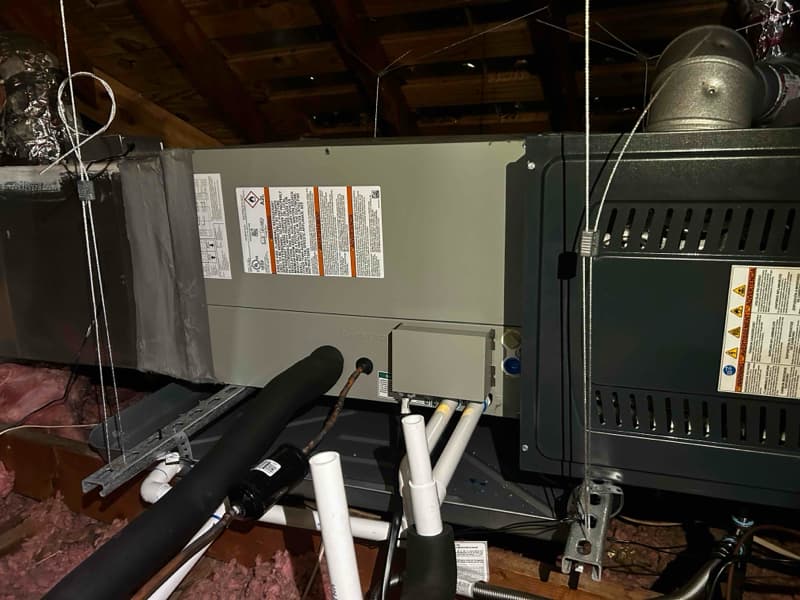
Where to find your evaporator coil: Look for a metal cabinet (the air handler) connected to your furnace or installed as a standalone unit in a closet or utility space. The evaporator coil sits inside that cabinet behind a removable access panel, on the side where air enters before it passes over the coil and gets cooled.
How Do You Know If Your Evaporator Coils Need Cleaning?
You don't need to open the air handler to recognize the symptoms of a dirty evaporator coil. The system will tell you something is wrong through its performance. Here is what to watch for:
Weak airflow from your vents. If your AC is running but the air barely moves, a clogged coil is restricting the airflow path through the system.
Longer-than-normal cooling cycles. The system runs and runs without reaching the thermostat setpoint because the dirty coil can't transfer heat efficiently.
Higher electricity bills without increased usage. Dirty coils force the compressor to work harder, which pulls more power and shows up on your utility bill.
Ice or frost on the coil or the refrigerant line. A frozen coil is one of the clearest signs of restricted airflow, and dirty coils are the number one cause of that restriction.
Musty or stale smell coming from the vents. Mold and mildew colonize damp, dirty coil surfaces and get circulated through your home every time the fan runs.
The system seems to have lost capacity. If your AC used to keep up with DFW summer heat and now struggles, dirty coils are a primary suspect before anything else.
If you're seeing two or more of these at the same time, cleaning the coil should be the first thing you try before calling anyone.
What You Need to Clean Evaporator Coils (Tools and Supplies)
You don't need HVAC training or expensive equipment. Everything here is available at any hardware store or on Amazon for under $30 combined.
Tools:
- Flathead and Phillips screwdrivers (to open the access panel)
- Shop vac or household vacuum with a soft brush attachment
- Stiff-bristle nylon brush or a soft-bristle paintbrush
- Flashlight or phone flashlight
- Safety glasses and work gloves
Supplies:
- No-rinse evaporator coil cleaner (foaming spray) such as Nu-Calgon Evap Foam No Rinse -- runs $12 to $15 at HVAC supply houses, Home Depot, or Amazon
- Clean rags or paper towels
- Optional: distilled white vinegar for the condensate drain
What to avoid: Do not use household all-purpose cleaners, bleach, or acidic products directly on the coil. Evaporator coil fins are thin aluminum and corrode quickly with the wrong chemistry. No-rinse coil cleaner is specifically formulated to be safe on the metals used in residential coils and to rinse itself out without water.
How to Clean AC Evaporator Coils Inside Your House Without Removing Them
This method works for the vast majority of residential split-system air conditioners and heat pumps installed in DFW homes. You do not need to remove the coil from the air handler cabinet. The entire process takes 45 minutes to one hour, including the foam's working time.
Step 1: Turn Off the AC at the Thermostat and the Breaker
Set your thermostat to Off rather than just switching to Fan mode. Then go to your electrical panel and flip the breaker for your air handler and furnace to the off position. Do not skip this step. Evaporator coils operate in a live electrical environment with capacitors that hold a charge, and the blower fan can cycle on unexpectedly if power remains connected.
Pro tip: After shutting off the system, wait 5 to 10 minutes before opening anything. If the coil was running recently it will have active condensation on the fins. Letting it sit briefly gives you a drier surface to work with and makes the condition of the coil easier to assess.
Step 2: Locate and Open the Air Handler Access Panel
Your air handler has at least one removable access panel, held in place by screws or snap latches. The evaporator coil is inside the section of the cabinet directly above the blower fan compartment, on the supply air side. Remove the screws and set the panel carefully to the side.
On some units, the panel seam is covered with foil tape. Use a utility knife to cut through it cleanly. You'll need to re-tape the seam with HVAC foil tape when you finish, so don't rip it away.
What you'll see: A set of metal fins arranged in an A-frame, slant, or flat configuration. The fins are thin aluminum, easy to bend, so everything from here on is done with a light touch.
Step 3: Inspect the Coil and Vacuum Loose Debris
Before applying any liquid, remove the loose material first. Attach the soft brush tool to your shop vac and gently vacuum the surface of the coil fins, moving in the direction the fins run rather than across them. This pulls out loose dust, pet hair, and surface debris without pushing it deeper into the coil.
For material stuck between fins, use a nylon brush or soft paintbrush and sweep in the direction of the fins only. Never use a metal brush or scrub across the fins perpendicular to their alignment.
What you'll typically find in DFW homes: Most coils that haven't been cleaned in more than a year have a visible gray or brownish layer across the fin surface. In homes with pets or with only basic 1-inch fiberglass filters, the buildup can be heavy enough to visibly block the fin gaps.
Step 4: Apply No-Rinse Coil Cleaner From Bottom to Top
Shake the can well before use. Hold the nozzle 6 to 8 inches from the coil surface and spray in a deliberate bottom-to-top direction, working across the entire coil face.
Spraying upward is the pro technique here and it matters: foam moving upward pushes loosened debris and particles in the direction gravity will eventually take them, toward the drain pan below. If you spray top-down, you drive debris deeper into the coil before the foam can lift it out.
Apply an even coat across the full coil surface. The foam will expand and within the first couple of minutes you'll see it discolor as it reacts with the biofilm and compacted dust.
Let the foam sit for 15 to 20 minutes. Do not rush this. The chemistry in no-rinse coil cleaner needs time to penetrate the biofilm layer, break down mold, and lift the compacted dust matrix off the fin surface. Fifteen minutes is the minimum. If the coil hasn't been cleaned in several years, let it work the full 20 minutes.
Step 5: Let the Foam Drain Into the Condensate Pan
As the foam breaks down it liquefies, and it carries the loosened debris with it down into the drain pan beneath the coil. You do not need to rinse it. No-rinse cleaner is specifically designed to drain out through the condensate line during normal system operation.
While you're waiting and watching the foam work, check the drain pan directly. If you see standing water, slime, or dark organic buildup at the bottom, the condensate drain line is at least partially clogged. This is extremely common in DFW homes during peak summer when the AC runs nearly continuously. A clogged condensate drain can back up and overflow into your ceiling, drywall, or subfloor.
Pro tip: Pour about one cup of distilled white vinegar directly into the drain pan and let it flow down the condensate line. Vinegar kills the algae colonies that form in drain lines and helps keep the line clear between service visits. Do this every 6 months as a maintenance habit.
Step 6: Wipe Down the Cabinet Interior and Reassemble
Use a clean rag to wipe down the inside surfaces of the air handler cabinet, the edges of the drain pan, and the area around the coil. Remove any debris that fell off during the process.
Take a final look at the coil with your flashlight. It should look visibly cleaner than when you started, with open fin structure visible instead of a matted gray surface. A good cleaning will restore most of the original silver color of the aluminum fins.
Reinstall the access panel. If you cut through foil tape to gain access, apply new HVAC-rated foil tape (not regular duct tape or packing tape) along the full length of the seam. Unsealed gaps in the air handler cabinet reduce system efficiency and can pull unconditioned attic air into your ductwork.
Step 7: Restore Power and Test the System
Return to the breaker panel and restore power to the air handler. Set the thermostat to Cool and dial it down a few degrees below the current indoor temperature to initiate a cooling call. Let the system run for 10 to 15 minutes and check:
- Airflow from the supply vents should be noticeably stronger than before the cleaning
- The air coming from the vents should feel cooler and drier
- No ice visible on the refrigerant line exiting the coil cabinet
- No musty or chemical smell from the vents after the first few minutes
If airflow and cooling have improved, the cleaning worked. If the system is still underperforming, the issue may be something other than coil fouling, low refrigerant from a leak, a failing blower motor, or a coil that needs more than a DIY cleaning. Those require a licensed HVAC technician.
How Often Should You Clean Evaporator Coils?
For most DFW homes, once a year is the right schedule. The ideal timing is just before cooling season starts, somewhere between late February and early April, before you're depending on the system every day.
Increase the cleaning frequency if your home has:
- Pets that shed heavily -- clean every 6 months
- Basic 1-inch fiberglass filters rather than MERV 8 or higher pleated filters -- clean twice a year
- A history of musty odors from the vents -- inspect every 6 months
- Recent interior renovation or construction nearby -- inspect after major dust-generating work
Homes running quality MERV 8 to MERV 13 filters changed every 60 to 90 days tend to have slower coil fouling and may be able to stretch to 18 to 24 months between cleanings. The filter is the primary defense for the coil. Skimping on filters always costs more in coil cleaning, system wear, and efficiency loss over time.
What Does a Dirty Evaporator Coil Actually Do to Your AC System?
The damage compounds over time and each stage is more expensive to fix than the last.
Frozen coils. When airflow through the coil drops below the level required for proper heat absorption, the refrigerant inside the coil can't absorb enough heat and the coil surface temperature falls below 32 degrees Fahrenheit. Condensation on the fins turns to ice, which further restricts airflow, which makes the freezing worse. A fully frozen coil produces zero cooling and zero airflow.
Compressor damage. The compressor is the most expensive single component in your AC system, commonly $1,500 to $2,500 to replace in DFW. When the coil can't transfer heat efficiently, the compressor has to work harder and longer to meet demand. That extra load accelerates compressor wear and shortens its operating life.
Mold circulation. A damp, debris-coated coil surface is ideal for mold colonization. Once established, mold on the evaporator coil spreads into the supply ductwork and gets blown into your living spaces every time the system runs. Mold remediation in ductwork is significantly more expensive and disruptive than a coil cleaning.
Efficiency loss. Research by ASHRAE found that dirty evaporator coils can reduce system efficiency by 5 to 40 percent depending on the degree of fouling. At Texas electricity rates during summer peak hours, that inefficiency adds up fast.
A $12 can of no-rinse coil cleaner and an hour of your time once a year is one of the best-ROI maintenance tasks in residential HVAC. Replacing a compressor because a dirty coil ran it into the ground costs 100 times more.
When DIY Coil Cleaning Is Not Enough
There are situations where no-rinse foam and a shop vac won't fully solve the problem. Recognize these signs and call a licensed HVAC technician:
The coil is frozen solid. Don't try to chip or scrape ice off the fins. Turn the system off and set the fan to run-only (no cooling) or simply let the system sit powered off for 24 to 48 hours until it fully thaws. Once thawed, clean normally, but have a technician determine the underlying cause, frozen coils usually indicate more than just dirt.
Visible physical fin damage. Bent or crushed fin sections block airflow even after the coil is clean. A technician can use a fin comb to straighten minor damage. Severe fin damage may warrant coil replacement.
Mold is established deep in the coil block or drain pan. Surface mold on the fin edges can be handled with a thorough coil cleaning. A mold colony that has worked its way into the interior of the coil block, the drain pan walls, or the ductwork requires professional remediation.
The system still underperforms after cleaning. If cleaning the coil doesn't restore performance, the issue may be a refrigerant leak, a failing expansion valve, a blower motor problem, or a system that is undersized for the load. None of those are DIY repairs.
You have a heat pump. Heat pumps have evaporator and condenser functions that reverse seasonally. Cleaning both the indoor and outdoor coils properly requires refrigerant pressure awareness that should be handled by a licensed technician.
Team Enoch holds active Texas HVAC license TACLB00086312C and has been servicing homes in Dallas, Fort Worth, Arlington, and the surrounding DFW area since 2015. Our technicians perform professional evaporator coil cleaning, condensate drain flushing, refrigerant charge verification, and full system tune-up in a single visit. Call us before the summer heat hits.
Ask Us Anything