Get Quote
We normally respond to quote requests within minutes, but if you require immediate assistance please feel free to give us a call at 817.857.8326
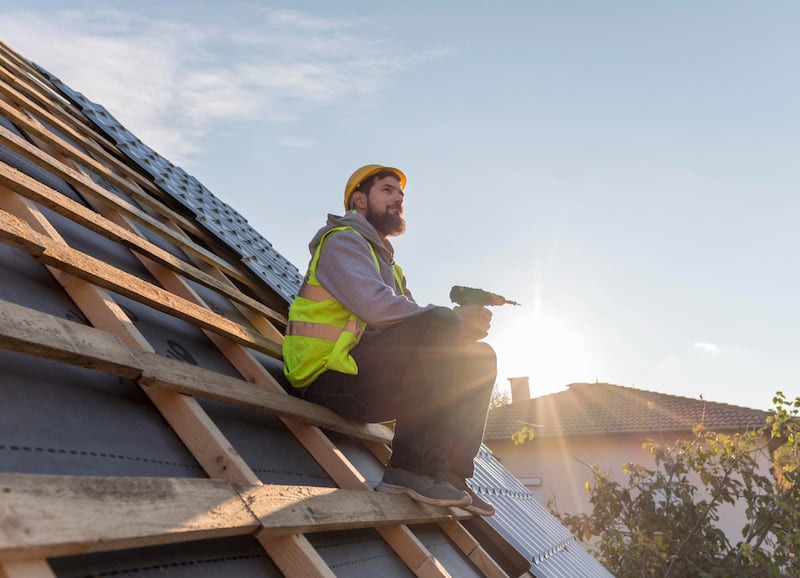
Roofing your home can be an expensive proposition. But a DIY roofing job can save you a significant amount of money. And in many cases, it is a job that the determined do-it-yourselfer can handle. Be honest with yourself before you consider the job, however. Roofing your home will require some hard work, and if you’re hesitant about heights it may not be your cup of tea. But if you’re willing to invest the sweat equity, a DIY style roofing job is something you can handle.
You can replace your existing roof for a variety of reasons, including aesthetic appeal. But in most cases, roofs are replaced because they’ve become damaged or have reached the end of their working lifetime. Here are a few signs that your roof needs some attention right away.
Learn more about tell-tale signs you may need a new roof with this guide.
The most successful projects are the ones that are well-planned out. To make sure that your roofing job goes smoothly, check out these steps and lists.
Check local ordinances
In some cases, you may require a building permit to reroof your home. If in doubt check with your local city or county offices.
Calculate the materials you’ll need
Get up on your roof and measure the area so you’ll know how much underlayment, felt paper, and shingles you’ll need. Coverage is measured in square feet — simply multiply the length and width of your roof (in feet) together to determine the square footage.
Be prepared for the debris
Arrange to rent a dumpster from your local sanitation service. You don’t want to end the job with a pile of debris in your yard, after all! And if you don’t own a tarp, buy one or two to cover the ground around the area where you’ll be working. It’ll make cleaning up a lot easier.
Materials
Here are the basic materials you’ll need for putting on a new roof.
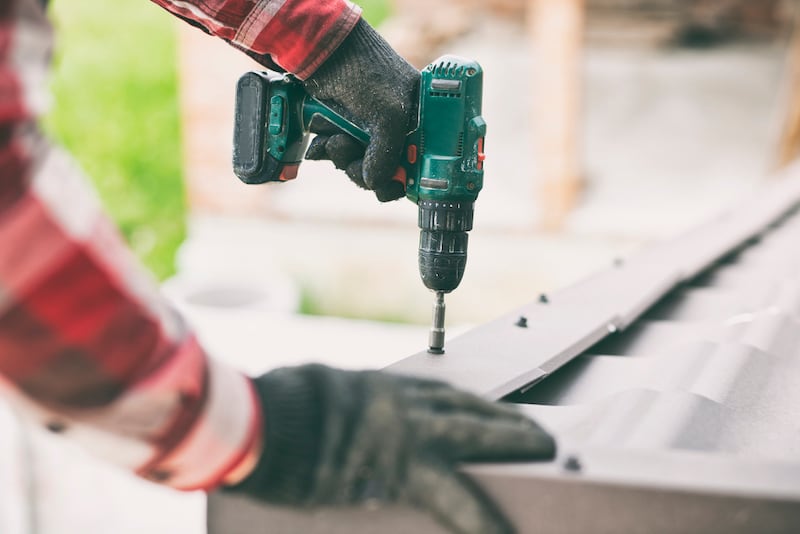
Tools
There are a variety of tools you’ll need to roof your house. Here’s a list.
If you have a large roof to cover, consider renting a nail gun and air compressor. This will make attaching the shingles go much more quickly.
While the style and slope of a roof can make a big difference in the difficulty of the job, all roofing jobs should be approached with caution. Always follow these safety tips when working on a roof.
Let’s Begin!
Once you’ve done the prep work and gathered the materials you need, you’re ready to launch your DIY roofing job. Follow these steps and take your time and you should enjoy the results of your labor.
If you’re going to do your DIY roofing job the right way, the first step is to remove the old shingles and underlayers. To avoid a mess, lay tarps around the areas where you’ll be working, being sure to cover plants, heat pumps, and other areas you need to protect. Scrape off the old shingles and underlayers using a garden fork or roofing shovel. Start at the top and work your way down the roof, rolling up the shingles before you as you go. It’s a smart idea to carry a hammer with you on your tool belt so that you can hammer down or remove any nails that are sticking up as you go.
Once you’ve pushed an area of shingles to the edge of the roof, toss them down to your dumpster or refuse pile. Be sure to wear work gloves to protect your hands during these steps.
After the old roofing has been removed, clear the roof of any stray debris with a broom, air compressor, or leaf blower. You’ll now install a waterproof, self-adhesive underlayment to the roof surface. This important step provides an extra layer of protection against moisture from rain, snow, and ice.
Begin at the bottom of the roof and work upward when installing the underlayment. The underlayment will have a guide marked on it to show how far each layer should overlap. This will prevent water from working its way under the shingles and onto the wood of your roof. Always peel off the self-adhesive backing at the top of each course, then attach the bottom once it’s straight and even. Laying a chalk line as a guide for each strip as you unroll the underlayment will make it easier to keep the rows straight.
Also known as felt paper or builder’s paper, installing this layer is the next step of your DIY roofing job. Roll your tar paper out perpendicular to the underlayment, so that each strip starts at the crown of the roof and extends down the roof. Straighten each piece, and staple it into position, then staple thoroughly the length of the paper, making sure that there is a staple at least every 12 inches. Overlap the paper using the guides printed on it as you lay each strip. Once you’ve papered the roof, lay a piece of tar paper evenly on the ridge of the roof and staple it into place.
Flashing adds an extra layer of protection against water. Flashing should be installed at the bottom of any valleys on your roof, and around areas like chimneys or standpipes. Measure and cut your flashing and nail it into place. Make sure that it’s flush with the roof, and seal around the edges with waterproof caulk.
Now you’re ready for the crowning touch of your DIY roofing project, laying the shingles. The first shingles you lay are known as the “starter shingles.” These are extremely important because they’ll guarantee an even and consistent job. If you don’t get these right, you’ll end up with crooked shingles lining your roof!
Start by finding the center of the roof at the top. From this point, snap a vertical chalk line. Using this line as a guide, begin laying the shingles to either side of the line, starting at the bottom of the roof. Place the first starter shingles so that the bottom edge hangs ½” over the edge of the roof.
With your starter shingles properly attached, you can begin laying the new shingles. Starting at the bottom of the roof, work your way up so that each row of shingles overlaps the previous one. Use the guides you find on each shingle to get the proper degree of overlap, then nail each shingle down with four or more roofing nails. Take the necessary time to ensure that you’re keeping the rows of shingles straight as you work your way up the roof. This is where some strategically placed chalk lines will really help.
Once you’ve reached the top of the roof, you’ll complete the job by capping the ridge. This important step creates a barrier that prevents water from working its way underneath the shingles from the top of the roof.
To cap the ridge, orient your shingles 90 degrees from the rows you’ve laid. Nail down the first shingle at the edge of the ridge, then continue laying shingles as you move down the ridge, overlapping the shingles to make a water and windproof barrier.
Once all the shingles are laid, it’s time to carefully check your work. Nail down any protruding nails and seal any exposed flashing or joints with a waterproof sealant to prevent leaks. Do a final inspection to make sure you haven’t left any tools or debris on the roof or in the gutter. Inspect carefully around your home as well for nails or other debris.
Does this sound like a project you want to tackle? Good luck to you if you say yes! But if you’re hesitant about doing the job yourself, you should get the job done by a company you can trust. Whether it’s roofing inspections, repair, or installation, Team Enoch has the experience and expertise to do the job. Our professional roofing teams can handle any job, from small to large, and all of our roofing experts are background checked, specially trained, and fully insured. And we warranty all of our work.
Whatever the size of your roofing job, or whatever your roofing needs are, contact us. Remember, estimates are always free!